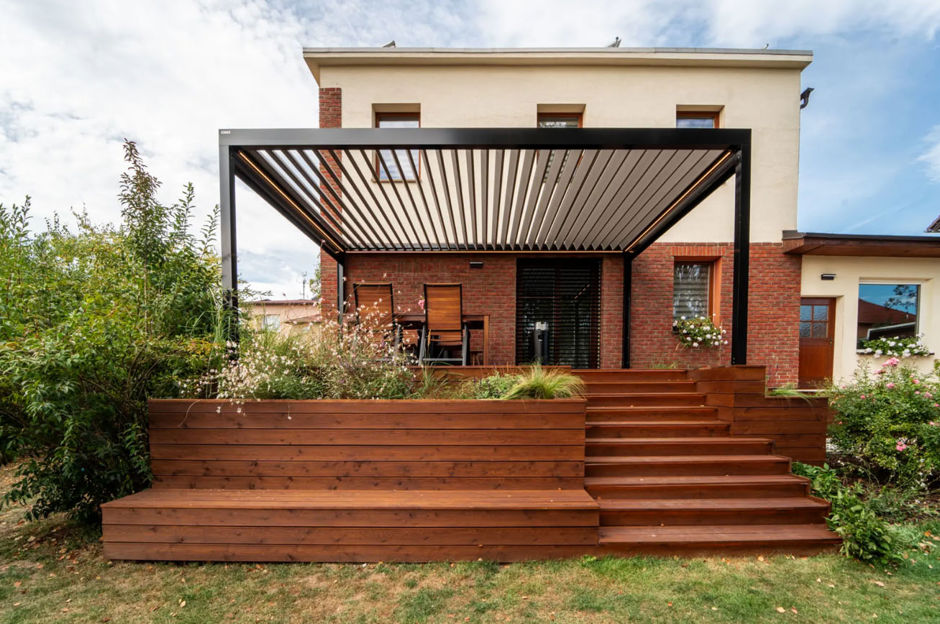
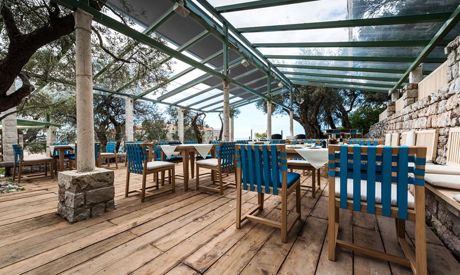
What is a bioclimatic pergola?
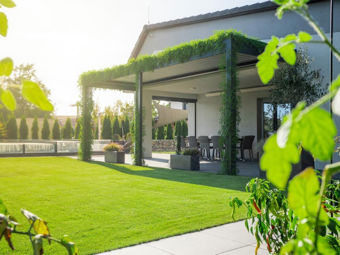
The ARTOSI bioclimatic pergola is a modern metallic pergola with a clean design and adjustable roof slats. What do our pergolas offer?
- Shading regulation: You can adjust exactly how much light and sun you wish to let in.
- Natural ventilation: Air flow under the pergola ensures a pleasant climate, even during the hottest days.
- Rain protection: When shut, the slats form an impermeable roof.
- Customisation: The roof can be divided into multiple sections with independent controls.
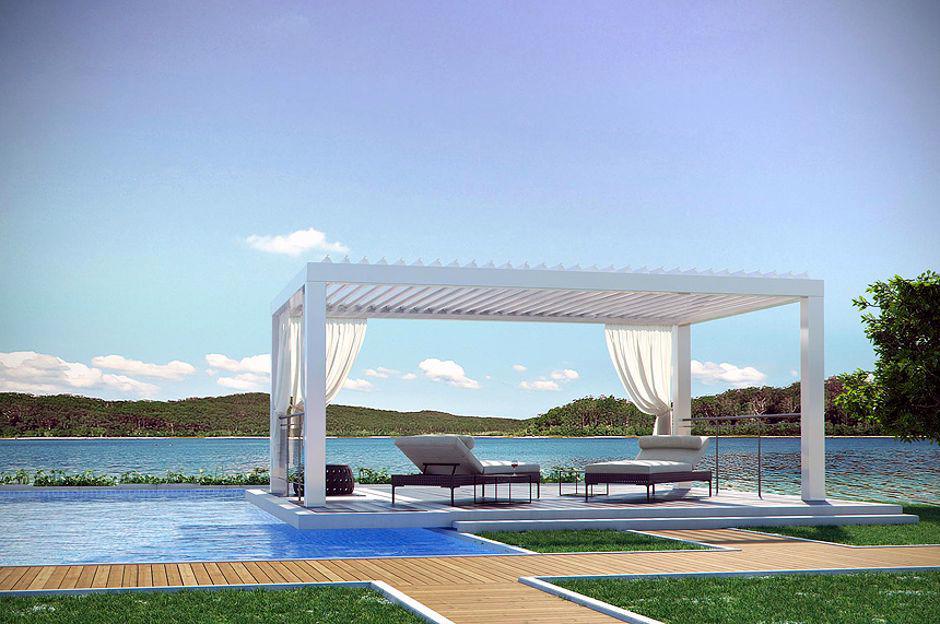
Our ARTOSI pergolas combine function with an elegant design that will stand out on a terrace, in a garden, and in commercial areas as well. For even greater comfort, we recommend getting screen blinds for the pergola side walls, which will protect you from the wind, rain, and even cold.
Configure your aluminium pergola
ARTOSI aluminium pergolas
- Easy DIY installation: The ARTOSI aluminium pergola is so designed that it can be installed even by less experienced do-it-yourselfers. All our products are supplied with detailed instructions on how to set up our pergolas on your own.
- Durability and long life: Aluminium is highly resistant to corrosion, weather, and mechanical wear. Our pergolas will last for years, without the need for expensive maintenance.
- Eco-friendly solution: Our pergolas allow natural temperature regulation, saving energy and contributing to sustainable living.
- Elegant design: We manufacture our aluminium pergolas in various shades and designs, so that you can easily match them to the exterior of your home.
How to install the bioclimatic pergola on your own
You can anchor the pergola to a wall of your house, or it can be free standing. We supply our pergolas with high-quality fasteners for secure anchoring. As an example, we chose a wall-anchored pergola.
DIY installation of the aluminium pergola is quite simple. You will need basic tools such as a tape measure, a drill, a plumb line, a shop vac, and a saw. At least three pairs of hands are required when installing the pergola, especially for safe handling of the individual components. Let’s get to it.
- Take exact measurements of the pergola site.
Start by accurately measuring the space where you want to install the pergola. It is important to take the type of foundation into account so that the structure is stable. The pergola’s bases are to be anchored to non-freezing depth and to a solid foundation. - Anchor the structure.
The pergola is supported by bases that must be anchored into the ground. After measuring the supporting structure distances, use the template provided to drill the holes, remove all dust from them thoroughly, and apply the chemical anchor. Insert the threaded bars into the anchor, leaving them protruding by ca. 30 mm. Apply the bases to the threaded bars and secure them with a nut and a washer.
Anchoring must also be performed on the wall of the house where the support profile will be installed. Mark the exact positions for the profile anchoring. A foolproof method is to raise the support profile to the required position and trace all holes. Three people are required to do this – two for raising the profile, and one for marking the holes. After drilling, apply the chemical anchor and insert the wall plugs. Once the chemical anchor has set, you can raise the profile again and secure it into place.
Route the electrical supply through one of the poles or a profile on the façade. - Install the structural elements.
Set the poles into the bases and fasten, but do not tighten the nuts all the way. Raise the upper profiles onto the poles and bolt them to the supporting structure and to the poles. Align and straighten the structure, and only then tighten the fasteners all the way. - Roof the pergola.
Adjustable slats with electrical controls are to be installed into the roof. Lead the supply cable out to the wiring box and seal the holes with covers. It is also necessary to install the gutter profiles between the house façade and the pergola’s supporting profile.
The adjustable slats are to be installed after completing the basic structure. They are to be inserted one after the other into the ready-prepared holes and the sliding mechanism. - Add accessories.
If you intend to install screen shutters to the sides of the pergola, don’t forget to install the guide rails to the poles and the house façade.
Accessories and upgrades to our metallic pergola
Various accessories can be added to modern metallic pergolas to increase their comfort and appearance.
- Side shutters or curtains – protection from the wind and eyes of your neighbours.
- LED lighting – the perfect solution for your nights out.
- Automation – rain sensors that shut the slats automatically in rain, or remote control of the slats.
Invite ISOTRA professionals to install your pergola
Not confident enough to install the bioclimatic pergola on your own, or is your own time too valuable? Take advantage of our installation services and have your pergola installed by our experienced fitters.
